
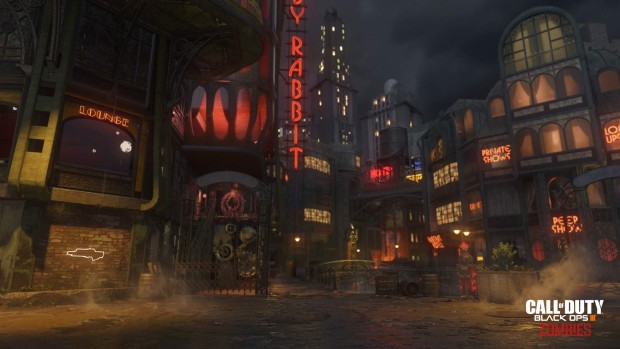
There are a total of 12 base multiplayer maps in Call of Duty: Black Ops 3. Similar to previous Call of Duty entries, almost all the multiplayer maps use the same formula of having three distinct lanes to move about the map.
Each map has been carefully designed to encourage boost jumps and wall-running.
In addition to this, there are multiple wallrunning structures scattered across each map which can be used to chain wall-running and in order to reach from one spawn to another without needing to touch the ground.
While this may sound good in theory, there is no practical application of this. This guide provides an overview of all the multiplayer maps in Call of Duty: Black Ops 3:
Aquarium
There are a total of 12 multiplayer maps in Call of Duty: Black Ops 3. One of which is ‘Aquarium’ revolving around an abandoned aquarium in the gardens in Singapore. Like any typical COD multiplayer map, Aquarium is divided into 3 distinct lanes.
There is a small building located on the central pathway which splits into the rest of two pathways. Most of the engagements happen in the largest room of the building which is quite roomy than the smaller pathways around the central building.
The window overlooking the stairway inside the area is a good spot in addition to low walls and sitting places which provide excellent cover. There is a pool on the north side of the map which is directly connected to another small building .
In addition to this, there is another pool on the south side of the map which is also connected to a nearby building. Players can simply wall-run along the long wall, jump into the pool, or hop over from stone to stone in order to reach the farther end.
Although you cannot jump on top of the prototype ship near the spawn area, you can use the wooden pillars around it to head glitch and eliminate incoming threats.
While you’re looking forward to pushing spawns, do make sure to take advantage of pools instead of just pushing through the door. Another thing that you should consider is to take advantage of little wallrunning spots which will allow you to catch enemies off-guard and by surprise.
In the middle of the area, instead of just walking through the door, make sure to utilize the wallrunning spot under the large whale and head inside the open window directly.
Exodus
One of the 12 multiplayer maps featured in Call of Duty: Black Ops 3 is called Exodus. The map is basically a quarantine zone set in Singapore.
Just like ‘Aquarium’, the map is also divided into three pathways. There are a couple of barriers located in the central pathway which cut it down. You need to head inside the nearby buildings in order to reach the adjacent pathways.
The path on the north side of the map houses a small garden, narrow alleyways, and some corners which can be used to ambush enemies.
The south side, on the other hand, is directly connected to a rooftop of a semi-demolished building which can be used to head over to the central pathway. Beware while running on this area as you come across unexpected snipers and campers.
When we talk about wallrunning in the map, do note that you cannot run along yellow and orange buildings due to air-condition units placed on them.
Once you reach the turtle area, you will have to utilize wallrunning in order to hop on top of it. In addition to this, you can also utilize the chain in order to wallrun to farther sides.
Also note that you can wallrun on the ambulance and the flat-white wall and red-panels inside the Quarantine Zone, however, you cannot do so on the barricades.
You can also chain the wallrunning using multiple buildings, but you need to make sure you don’t jump on buildings with air-conditioning units. Another thing to note here is that there are not a lot of head-glitch positions in this map when compared to Aquarium.
Evac
Another multiplayer map set in Singapore is called Evac and is set in Downtown Core atop a large building.
Similar to other maps, the multiplayer map is divided into three distinct pathways. The north side of the map revolves around the two-floored building which is an ideal location for snipers and campers alike.
The south side, on the other hand, houses another building which is directly linked to a main building. Lastly, the main building is connected to all adjacent buildings using narrow alleyways.
The central area of the main building is quite large and may house engagements with players pouring in from the south side.
Breach
Breach is one of the 12 multiplayer maps featured in Call of Duty: Black Ops 3 which is set in Cairo, Egypt.
The map encourages a lot of jumping around and wallrunning in order to traverse around the map. A large portion of the map revolves around multiple roofs of a large building, but that does not mean the other smaller buildings are inaccessible.
Since these smaller buildings are campers’ paradise, you need to make sure that you toss in a couple of grenades before heading inside a room.
Coming to engagements, you will find it out in the open in the very center of the map. In addition to this, there are a couple of areas on each side of the map which provide sight on the bunker located in the middle of the rooftop.
Speaking of the obvious wall-running sequence in the map, you’ll come across a whole lot of players running on the inside, but what you won’t see is players running on the outside of this structure. In addition to this, you’ll also be able to shoot while running and eliminate players on the open room.
In addition to this, you can also wallrun into upper and lower burning buildings in the area. However, one last thing that you need to do
Fringe
Fringe is one of the 12 multiplayer maps in Call of Duty: Black Ops 3 which is set in an old train port in California, USA.
The central building in the middle of the map named Plumber Hardware is probably the best getaway option in case you’re receiving fire from either side, but make sure to toss in a couple of grenades in order to eliminate any campers inside.
In addition to this, there are a couple of multi-floored buildings along the middle pathway. You may come across snipers and a few campers inside these buildings.
Another thing to note here is these central buildings are not directly connected to the main building and you should watch out for some traps inside.
Combine
One of the maps which were featured in the game’s multiplayer beta is set on a small outpost in Sahara Desert and is called Combine. The map basically revolves around 2 buildings overlooking a small courtyard where most of the engagements take place.
Just like other maps, there are three lanes leading to each building and the courtyard. These lanes encourage wallrunning and you’ll see a lot of players using them instead of the mid route.
The said buildings are not large enough and only have a couple of rooms which encourage close-combat engagements. Make sure to be prepared to fire from the hip once you enter these buildings.
The open areas behind the two buildings are large enough, but players only use it to hide, in order to call in scorestreaks, and things like that. Make sure to check behind vehicles and large stones in order to find hidden enemies.
In addition to this, there are a couple of extended platforms overlooking the main courtyard which houses many quickscopers and people with Assault Rifles.
Due to a number of stones and small structures scattered across the map, it’s possible to head-glitch in a number of locations and eliminate enemies off-guard.
Havoc
Havoc in Call of Duty: Black Ops 3 is set in a military station in North America which once again revolves around three distinct lanes to move around the entire map.
Just like Combine, the central area of the map is the largest one and houses most of the engagements on the map. In addition to this, the central area is also directly connected to the side paths.
Similar to many other maps, there are plenty of vehicles and other small structures scattered around these side pathways which provide excellent cover and head-glitch positions.
The building on the north side of the map is a smaller one which encourages close-combat engagements and you should definitely consider tossing in a few grenades and be prepared to fire from the hip when heading inside the building.
The area on the south side of the map, on the other hand, leads to the sea where you can either jump one from stone to other or simply dive in to catch enemies off-guard. However, be prepared to find enemies inside. Pages: 1 2


 Black Ops 3 Dead Ops Arcade 2 Strategy Guide - Tips For High Rounds
 Black Ops 3 - How to Unlock Dead Ops Arcade 2 Secret Mode
 How to Level Up Fast in Black Ops 3, Prestige Fast With Quick Leveling Tips
 Black Ops 3 Zombies Shadows of Evil Glitches and Exploits: Invincible, Upgrades, Free Points
 Black Ops 3 Specialist Powers and Weapons Tips and Strategy